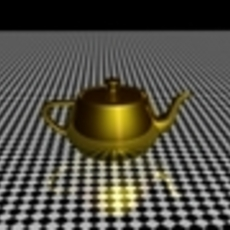
Gold and Copper Materials
Gold and Copper are closely related and the only real difference here is going to be the colors we use.
Gold
Click an empty material slot and rename it Gold the same way we renamed the Floor material. In the Shader Basic Parameters rollout choose Multi-Layer from the dropdown box.
Now in the Multi-Layer Basic Parameters rollout leave the Ambient and Diffuse colors locked and click the colored box next to Diffuse. Set the following values Red = 170, Green = 80, Blue = 0 and then click the Close button. Set the Diffuse Level to 25.
In the First Specular Layer section click the colored box and enter the following values Red = 255, Green = 236, and Blue = 23 then click the Close button. Still in the First Specular Layer section set Level to 75, Glossiness to 25, and Orientation to 90.
Now scroll down to the Second Specular Layer section click the colored box and set the following values Red = 188, Green = 75, Blue = 41 and then click the Close button. Still in the Second Specular Layer section set Level to 100, Glossiness to 30, and Anisotropy to 90.
Next scroll down to the maps section and if necessary click where it says Maps to expand the rollout. Go down to where it says Reflection, click the grey None button, and double click Falloff in the list. Now click the second None button and double click Raytrace leave everything at the default settings and click the Go To Parent button. Set the Falloff Type to Fresnel, lastly scroll down to the Mix Curve rollout and using the same method as described above make the curve match the image below and then click the Go To Parent button again.

Now apply the material to the Teapot by either clicking and dragging the material from the Material Editor to the Teapot or selecting the Teapot and clicking the Assign Material To Selection button. Render and voila! Convincing polished gold.
Keep the Material Editor open because the material we just created is the basis for all the others.
Copper
If you followed the previous steps you should be at the parent material already, if not keep clicking the Go To Parent button until it goes grey. Leave the Ambient and Diffuse colors as they are and go to the First Specular Layer section. Click the colored box and set the following values Red = 190, Green = 105, Blue = 78 and click the Close button. In the Second Specular Layer section click the colored block and set the following values Red = 255, Green = 102, Blue = 55 and click the Close button.
Leave everything else alone, apply the material to the Teapot and render shiny copper goodness.
Now onto Brass and Bronze.
Author: Lord Padriac
Submitted: 2007-07-31 17:08:04 UTC
Tags:
Software: 3dsmax
Views: 68,248
Related Items
-
Tesla Roadster 2020 Midnight Silver with interior and chassis 3D Model
$169.00 (USD) -
Tesla Model Y AWD Midnight Silver with interior and chassis 3D Model
$149.00 (USD) -
Tesla Model Y RWD Midnight Silver with interior and chassis 3D Model
$149.00 (USD) -
Quick and dirty medium/low res 45. Smith and Wesson handgun 3D Model
$25.00 (USD) -
Gold Rectangular Wall Mirror 3D Model
$24.00 (USD) -
Accent Table Gold Fish Base 3D Model
$60.00 (USD) -
Decorative Gold Plate Pino Vismara 3D Model
$24.00 (USD) -
Gold Wall Picture Frame 3D Model
$20.00 (USD) -
Gold Heart Pendant 3D Model
$15.00 (USD)


