Maya Tutorials
Tutorials
-
Hi Amigos, This tutorial gives you knowledge on the concept of UV pass shader. UV pass shader is used to render UV pass which will be used in compositing to modify texture of the selected object. To start, We will try to understand the concept of UV's in Maya above picture is UV layout in ...
-
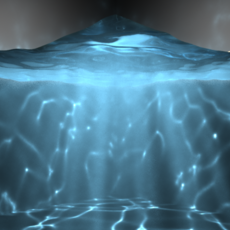
1. Overview This tutorial walks through the process of creating caustic effects in Autodesk Maya 2014 x64, using advanced shader techniques. It will be most useful to artists who already know some Maya basics: modeling, assigning materials, using the Channel Box, Attribute Editor (CTRL + A...
-
Hello there, my name is Raouf, I am a Technical Artist currently living in Clermont-Ferrand, France. In this "quick tutorial", I will try to explain how I created "Natascha" and break it down into multiple creation steps. I will be focusing mainly on the shading and texturing part in which I ...
-
In this tutorial we will be exploring the use of the Mental Ray node "parti_volume". in the past this has been somewhat troublesome for new and experienced users alike. however with this tutorial i aim to explain how to set it up in a way that will enable you to go ahead and put it to your ow...
-
Hey, in this cool tutorial i'll teach you how to add a thumbnail to your shaders in the hypershade library. normaly in your hypershade library you store all your shaders ...but they come with a defult maya logo and thats all.. ! and what if you have alote of shader ,and its very hard to remembe...
-
Hi! This tutorial will briefly look into Vray For Mayas Blend Material “VRay Blend MTL.” It is very useful when you need to add for exemple a text on materials and still keep the base materials properties, or when you have to use textures in layers. So for this tutorial we will create somethin...
-
How to install Shader Library in Maya 8.5 Open Maya 8.5 DVD >Tutorials_and_Extras>ShaderLibrary>copy folder shaders to Installed destination in local Disk(C:)>Program files>Autodesk>Maya 8.5 Run Maya. Open Hypershade. H...
-
Wireframe Rendering in Maya This tutorial will show you how to create a shader that will render a wireframe of your model and not render the backfacing wireframes. Before following the steps below, unwrap your mesh. 1. Take a snapshot of your UVs. 2. Create a shader node of your choice (I us...
-
Subsurface what?!? - Don't freak out! 'Subsurface scattering' is the term used in 3D graphics to describe the effect we see when, in the real world, light enters a surface (at least to some degree), bounces around a bit and is then either absorbed or reflected back out again. The e...
-
The Following exercise is just that, an exercise in getting a little more cooperation out of After Effects using Maya. It's not really about actual Z-Depth in After Effects, but Fun With Matte Keys instead. 1- Lets start with two planets, Earth and it's satellite, the moon (two spheres w/ the app...
-
To produce realistic 'soft shadows' in Maya, you have two solutions. # Ray-traced shadows (with radius > 0); it works pretty well, but the higher rays samples (at low value, you get a noisy shadow), the longer it'll take to compute an image. # Depth-map shadows, which is the quickes...
-
1. Create a NURBS surface and deform it a bit to get a nice-looking bumpy terrain. Create a camera 2. Open the Hypershader. Create a Blinn node and edit it as shown below: I highlighted in red the attributes that need to be edited. Don't forget the slight blueish Ambience, because sno...
-
Ok! Recently I bought the Advanced Shading Network Training video Tape from AW This tape hosted by Tom Kluyskens Talk about some advanced shading network and Hidden nodes like distanceBetween or closestPointOnSurface etc... and showed several way to use'em Looking this cool tape an idea comes ...
-
created this tutorial because manypeople in computergraphics fret greatly trying to make a wet looking shader. I also doit with a fast rendering shader that is easy and fast to set up,and doesn'tuse any plugins. It also doesn't hinder rendering speedlikea layeredshader can. Let's start. I ...
-
Maya has some good volume rendering posibilities, but the use of the volume shader is not really documented in the manuals. Each ShadingGroup has an input for a Surface, Volume and Displacement Shader. What Surface and Displacement do is clear. What the volume shader is good for sounds obvious, t...
-
Anodized Aluminum Start with a Phong shader. Make the color darker than the actual color chosen. Make the Specular Color almost a pure color of the color chosen as the primary, but just a little darker (this always seems to come out best for the aluminum). Change the Cosine Power to 2. Remember...
-
http://perso.club-internet.fr/emcam/ Creez dans l'hypershade un blinn, un ramp sans son 2d texture node, un blend color et un sampler info. Create in the hypershade a blinn material, a ramp (without 2d placement texture node), a blend color, and a sampler info node. Quand vous aur...
-
As you all noticed, Maya doesn't provide at all motion blur with shadows. This tutorial shows how to generate motion blurred shadows in a separate pass(es), to be composited or just remapped into an attribute of a material (mainly the diffuse attr). It's been tested with depthmap shadows, bu...
-
Most CG lights only lose luminosity as they fall off. This can look dull. If you can calculate what amounts to the light's facing ratio with respect to objects, you can use it to drive ramp-based color on the light itself. Here's a brief overview: 1) Get the world position of th...
Page 1 of 1


