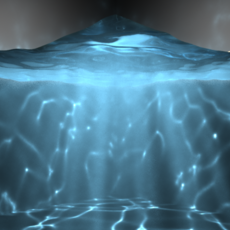
6. Water material settings
In this section, we’re only setting up the base color, refraction, and raytrace options for water. The main settings for caustics effects are in the sections following this one.
-
Select “waterSurface_pPlane1”, right-click and hold to bring up the context-sensitive menu and assign a new Blinn material
-
Select the material tab labeled “blinn1” and rename it to “waterSurface_blinn1"
-
Set both the “Color” and “Transparency” to a light Blue
-
Scroll down to “Raytrace Options”, enable “Refractions” and set “Refractive Index = 1.350”
NOTE: If you have any interest in Chromatic Aberration for your refractions, this is where it would be enabled. We don’t use it for this tutorial because it doesn’t seem to have any effect on photon colors, and has unpredictable effects on the color of the water surface.
Test render 3
At this point, you can see the light cast on the inside of the environment cube above being refracted through the water surface. But notice that the environment below the water is still very dark.
7. Water displacement shader — ocean
In order to distor the surface of the water to look like waves, we need to create an ocean displacement shader.
-
Select the “blinn1SG” shader group tab in the Attribute Editor (CTRL + A), and rename to “waterSurface_blinn1SG”
-
Press the checkered icon next to the “Displacement mat.” channel in the “Shading Group Attributes” rollout
-
Select “Ocean” from the list of materials to create the new displacement map
-
Rename the displacement shader to “waterSurface_displacementShader1”
-
Select the “ocean1” texture tab and rename it “waterSurface_ocean1”
-
Scroll down to “Wave Height” and change the “Selected Value” to “0.400”
-
If you want to animate the water, Right Click on the “Time”attribute and select “Create new expression” and enter “waterSurface_ocean1.time = time/2;”
-
To displace the water plane, return to the scene window and select “waterSurface_pPlane1”, then select “Modify > Convert > Displacement to Polygons with History”
Now the surface of the water appears to have waves, and the materials are in place to start casting photons from the area light.
Author: david allen
Submitted: 2014-05-14 18:18:06 UTC
Tags: coustics, maya, refractive, reflective, and volumetric
Software: Maya
Views: 58,921
Related Items
-
Animated Olympic Fire 2014 (Maya) 3D Model
$69.00 (USD) -
Elephant 3d textured model 3ds max and maya scene files 3D Model
$30.00 (USD) -
1-Click Texture Batch Bake for Maya for Maya 1.0.0 (maya script)
$20.00 (USD) -
"Rapid Rig: Poser" for Maya for Maya 2.0.9 (maya script)
$20.00 (USD) -
Nick-Maya Rig With Advance Facial Setup for Maya 0.1.0
$20.00 (USD) -
Pamela Maya (2013) Rig for Maya 0.0.1
$20.00 (USD) -
The Alchemy Tools for Maya for Maya 1.0.0 (maya script)
$20.00 (USD) -
Arab Rig for Maya with Ncloth simulation for Maya 0.0.1
$99.00 (USD) -
Poly Tools for Maya for Maya 0.4.2 (maya script)
$20.00 (USD)


